Presentation of the service

Management of payments by token

The payment by token management service allows merchants to offer their buyer the possibility to associate a token with a payment method, which will facilitate their subsequent payments on the website (no more need to re-enter the credit card number).

Tokens allow you to:

  • Make fast and secure payments.

    The buyer no longer has to fill in bank details when making subsequent payments (1-click payment).

    The gateway stores the bank details in a highly secure environment, in accordance with the PCI-DSS requirements. Only the token is transferred during the exchange.

  • Make recurring payments (subscriptions).
  Token are usable by all the shops of the same company.
The service also allows you to:
  • Identify cards that are due to expire, in order to notify the Merchant via a file containing the token of the expiring card.
  • Update the bank details associated with a token via the payment page, or manually via the Merchant Back Office.
  • Automatically detect if the payment method has expired and offer an update in case of payment by token.
  • When creating a token, detect if the payment method has been previously registered.
  • Manage other buyer detail updates.
 

In compliance with the banking data security and protection rules implemented by PCI DSS, the payment method details are destroyed after the associated token has not been used for 15 months.

The token will remain visible in the Merchant Back Office and can be updated with new details.

Recurring payment (subscription) management

The recurring payment management service allows merchants to create subscriptions with fixed amounts and payment schedule, also known as “recurring payments”, with or without an expiry date, within the limits of the card validity period.

When creating a recurring payment, the merchant defines the start date, the amount of the installments and the recurrence rule to apply.

Once the start date (also known as the “effective date”) has been reached, the payment gateway automatically processes the installments.

After that, the merchant can no longer edit the amount of the installment payments.

To be notified of the result of a deadline, the Instant Payment Notification URL when creating a recurring payment rule must be activated and configured from the Merchant Back Office (menu Settings > Notification rules).

In TEST mode, the transaction corresponding to the first installment is created no later than 1 hour after the subscription, according to the schedule determined by the subscription rule.

In PRODUCTION mode, transactions are created once a day between midnight and 5:00 am, in the Europe/Paris time zone.

Uniqueness of registered payment methods

By default, the gateway authorizes the buyer to register their payment method several times on the merchant website.

However, if the merchant wants to, they can enable an option via their Merchant Back Office that will allow them to detect when a token is created, if the payment method has been previously registered.

 It is not recommended to enable the uniqueness check of the registered payment method if you do not control its impact on your implementation.

Operating principle

Once the option is activated, the gateway verifies the validity of the payment method with the issuer each time a token is created, and then proceeds to verify the uniqueness of the payment method.

If the payment method has never been registered, then a new token associated with this payment method is created and its identifier is returned to the merchant website upon the end of payment notification.

If the payment method has already been registered (same number and expiration date), then an existing token is used and its identifier is returned to the merchant website upon the end of payment notification.

The returned buyer’s data is the same as the data transmitted by the merchant, and not the same as the details of the previously registered token.

The field vads_identifier_status is set to CREATED, even if in this case no token is created.

The notification then contains an additional field set to true:
  • vads_identifier_previously_registered for the notification in the Hosted Payment Form format.
  • paymentMethodTokenPreviouslyRegistered for the notification in the REST API format.
 
  • There is no detection of payment method uniqueness during the token update.
  • If the payment method is already associated with several tokens, the end of payment notification contains the identifier of the most recent token.
  • The creation of a token via Merchant Back Office is refused if the payment method is already associated with another token.
  • The vads_identifier_previously_registered field is not returned upon return to shop.
  • The vads_identifier_previously_registered field is never returned in the end of payment notification if no duplicate payment methods are detected. Therefore, the false value is never sent to the merchant website.

What should I do if a duplicate payment method is detected?

It depends on your business requirements.

  • You can decide to do nothing and provide the service or deliver the goods to the buyer.
  • You can check whether the customer code associated with the existing token matches the buyer’s customer code. If this is not the case, you can search if a family tie between the two customers explains why the same payment method is used by two different customers.
  • You can check if the person requesting the registration of the payment method is the same person who has already registered this payment method (e.g. by checking their contact details, e-mail address, country etc.).
  • If all the controls put in place fail, that means that you might be a victim of fraud and can then decide to cancel the payment.

Activation of the payment method uniqueness detection

  1. Via the Merchant Back Office, go to Settings > Company, then click on the Subscription and alias parameters tab.
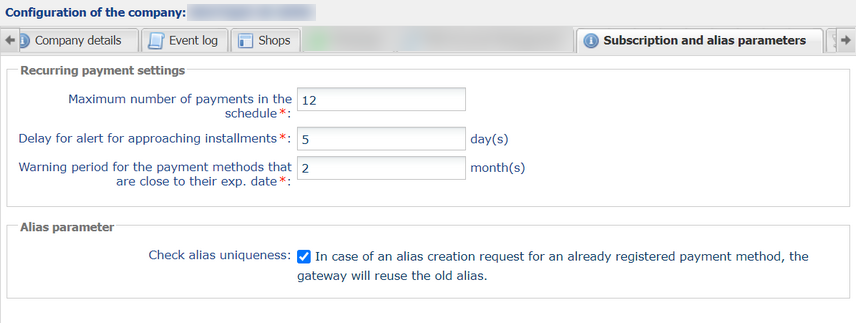
  2. In the Alias parameter section, check the Check alias uniqueness box.
  3. Click the Save button to save the changes.
Signing in to Merchant Back Office

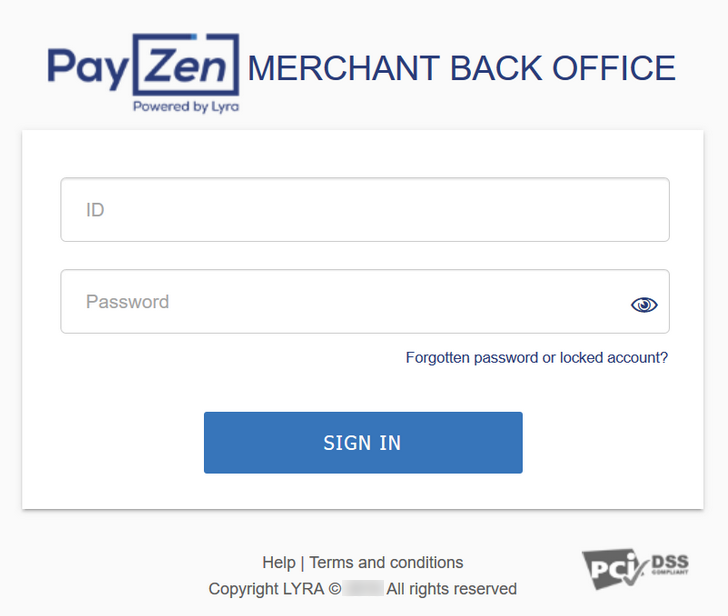
Sign in to the Back Office:
  1. Enter your login.
    The login is sent to the merchant's e-mail address (the subject of the e-mail is Connection identifiers- [your shop name].
  2. Enter your password.
    The password is sent to the merchant's e-mail address (the subject of the e-mail is Connection identifiers- [your shop name].
  3. Click Sign in.
    After 3 password entry errors, the user’s account is locked. Click on the link Forgotten password or locked account to reset it.
     

    A user's password is valid for 90 days. Beyond this period, a renewal will be requested when connecting.

Setting up notifications

Notification sent to the merchant website

The merchants offering payment by token on their e-commerce website may need to manually perform one-off operations with tokens or recurring payments.

In order for the merchant website to be notified about the actions performed with tokens via the Merchant Back Office (creation, update, cancellation), the merchant must enable and configure the notifications.

If you have several shops, only one of the shops will receive the notifications, but the created token can be used for payments made in all of the shops of the same company (legal name).

  1. Right-click Instant Payment Notification URL on an operation coming from the Back Office.
  2. Select Manage the rule.
  3. Enter the E-mail address(es) to notify in case of failure field in the General settings section.
    To specify several e-mail addresses, separate them with a semi-colon.
  4. Check the box Automatic retry in case of failure if you wish to authorize the gateway to automatically resend the notification in case of a failure (can be done up to 4 times).
  5. In the Instant Payment Notification URL of the API form V1, V2 section, specify the URL of your page in the fields URL to notify in TEST mode and URL to notify in PRODUCTION mode if you wish to receive notifications in the API form format.
  6. In the REST API Instant Payment Notification URL section, specify the URL of your page in the fields Target URL of the IPN to notify in TEST mode and Target URL of the IPN to notify in PRODUCTION mode if you are using the JavaScript client.
  7. Save the changes.
  8. Enable the rule by right-clicking Instant Payment Notification URL on an operation coming from the Back Office and select Enable the rule.

E-mails sent to the merchant

The payment gateway allows you to receive an e-mail notification when a token is created. The message contains:
  • the confirmation of buyer’s banking detail registration,
  • the buyer’s token that they can later use for another financial operation,

In order to receive this information by e-mail:

  1. Via the menu: Settings > Notification rules, click the E-mail sent to the merchant tab.
  2. Right-click Confirmation e-mail of recurring payment sent to the merchant.
  3. Select Enable the rule.
  4. Right-click Confirmation e-mail of recurring payment sent to the merchant once again.
  5. Enter the e-mail address to notify.
  6. Click Save.

E-mails sent to the buyer

The Merchant Back Office allows the merchant to configure e-mails sent to the buyer:

  • Confirmation e-mail of recurring payment.
  • Payment confirmation e-mail.
  • Token creation and/or update confirmation e-mail.
  • Pre-notification e-mail of SEPA direct debit to the buyer.

To configure these e-mails:

  1. From the Merchant Back Office, go to the following menu: Settings > Notification rules.
  2. Select the E-mail sent to the buyer tab.
  3. Right-click the rule to be modified and select Enable the rule.
  4. Right-click the rule again and select Manage the rule.
    The rule management wizard appears.
  5. Customize the label of the rule and the address to notify in the General settings section.
    To specify several e-mail addresses, separate them with a semi-colon.
  6. To customize the e-mail content:
    1. Click on Buyer e-mail settings to view the “default” body of the e-mail provided to all the merchants using the payment gateway.
    2. Select the tab corresponding to the language that you wish to customize.
    3. Click on Customize default text values.
    4. Edit the text of the e-mail.
    5. Click on Fields to include to display the list of fields available for e-mail customization.
    6. Select the fields that you wish to include into the e-mail. A detailed summary of the request processing will be added to the body of the e-mail.
    Note:
    To preview the changes, click Preview the e-mail at the bottom of the dialog box.
  7. In order to change the events that trigger the notification:
    1. Click the Rule conditions tab.
      A condition is composed of a variable, a comparison operator and a reference value.
      Example: "mode = TEST", "amount exceeding 1000". During the execution of a rule, the value of a variable is retrieved and compared to the reference value.
    2. Double-click on an existing condition to edit it.
    3. Click Add to create a new condition.
      All the conditions must be validated for the rule to be executed.
  8. Click Save.

Creating a token in Test mode

Prerequisites

  • The shop must be associated with a distance sale agreement.
  1. Display the list of TEST tokens via Management > TEST recurring payments.
  2. Click Create.
  3. Select the Shop to notify from the list if you have several shops.
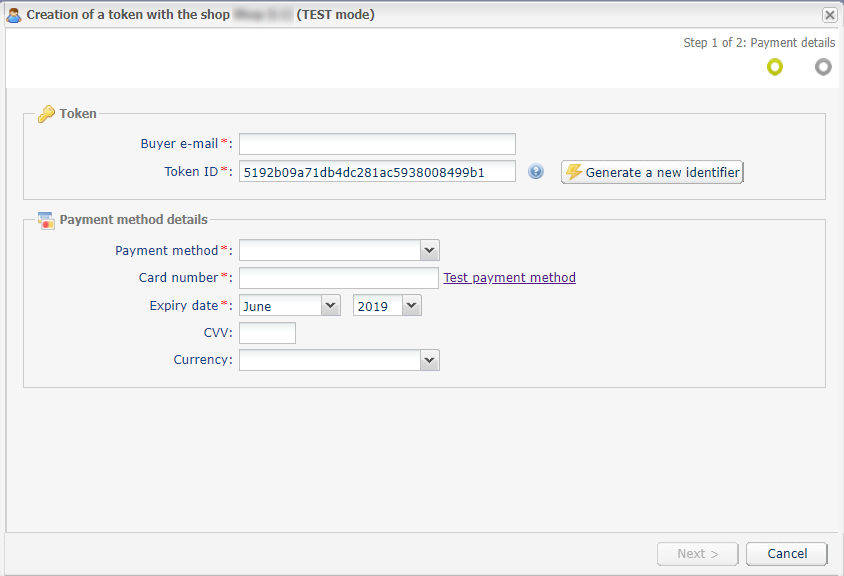
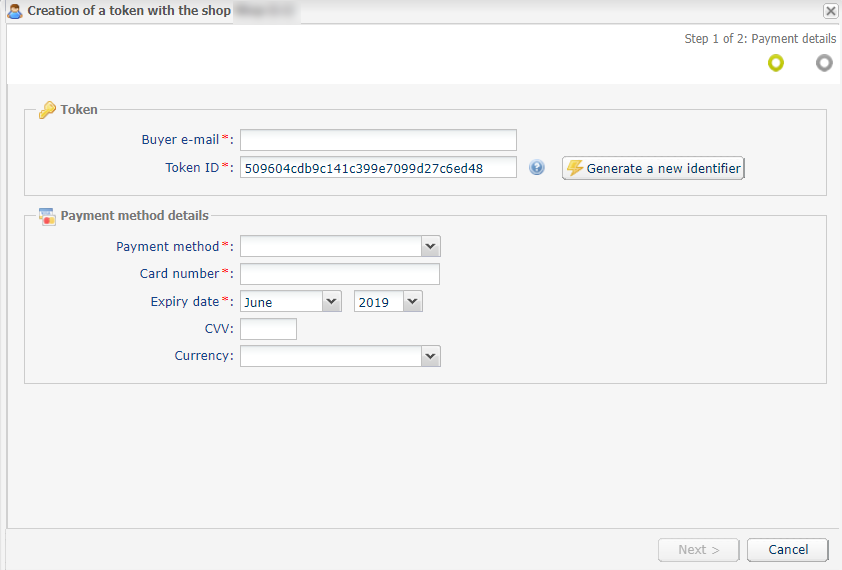
  4. Enter the Buyer e-mail e-mail address.
  5. A token is generated by default in the Token ID field. You can click on the button Generate a new identifier if you wish.
    You also can enter your own token. You must, however, make sure it is unique.
  6. Select the payment method from the list.
    The presented payment methods depend on the MIDs associated with your shop.
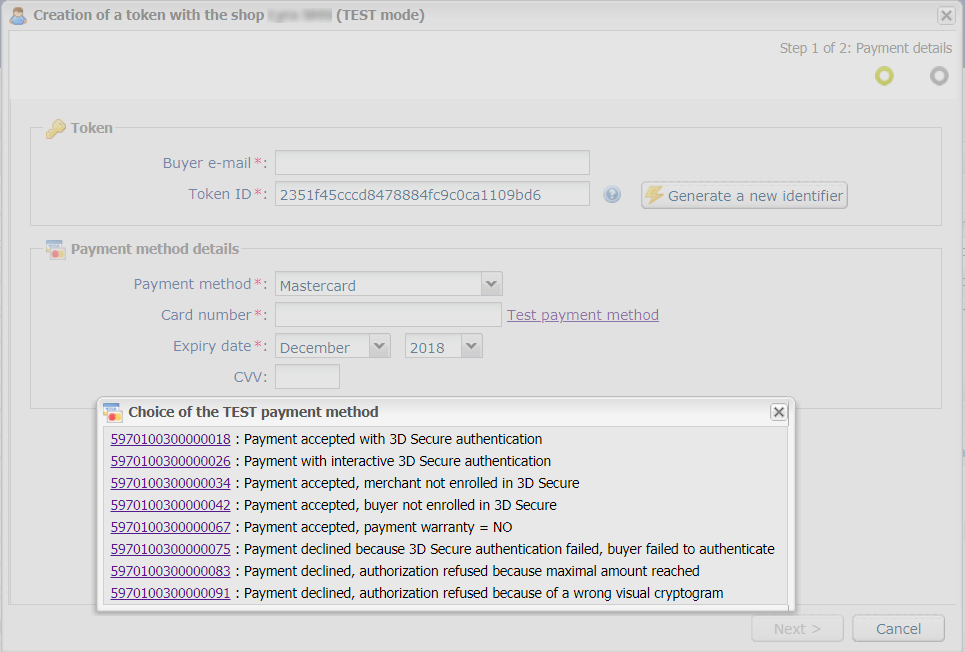
  7. Click on the Test payment method link, then on the desired number to automatically enter the details of the test payment method.
  8. If you wish, you can select the used currency when checking the payment method.

    This choice is useful when you have a multi-currency agreement associated with several shops, where each shop only supports one currency.

    It will always be possible to use the token for making payments in any currency supported by the agreement.

  9. Click Next.
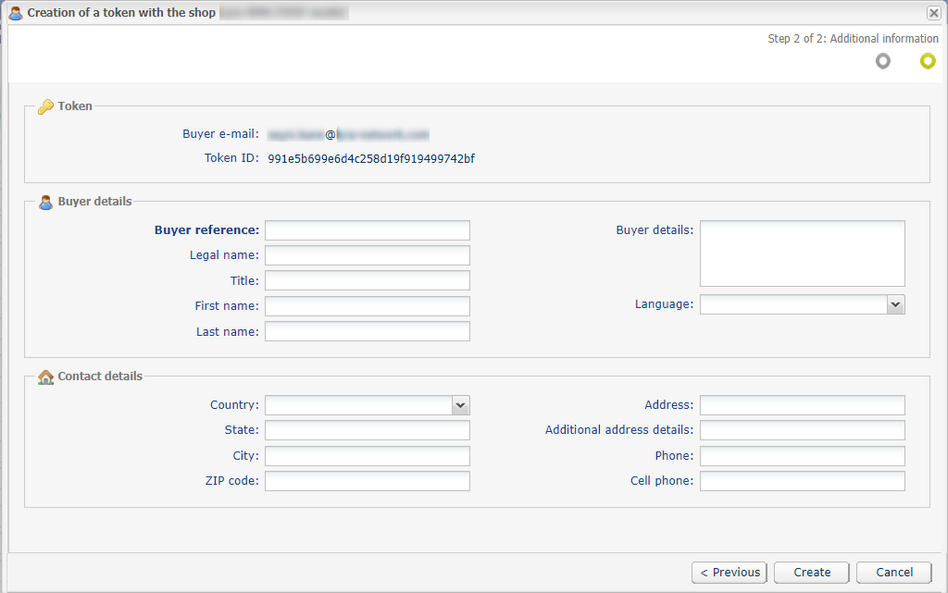
    The buyer detail entry page appears.
    The Token section reminds you of the specified e-mail and the created token.
  10. Fill in the information about the buyer.

    These details are useful for buyer identification.

    Fields marked with an asterisk (*) are required.

  11. Click Create to complete the process.

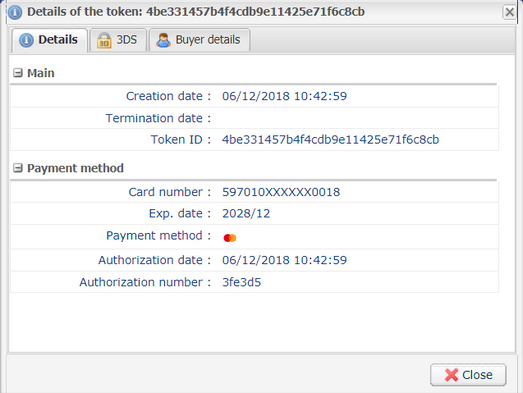
If all the payment method verification processes have been successfully completed, the token detail window appears.

Example:

The following tabs are available:
  • Additional

    Displays alias characteristics such as creation date or token ID.

    The token ID corresponds to the newly created token. Later on, it can be used for another financial operation in your shop(s).
  • Buyer information

    Displays the buyer’s personal details.

 The token will not be created if the authorization request is rejected.

Creating a token in Production mode

Prerequisites

  • The shop must be associated with a distance sale agreement.
  1. Display the list of PRODUCTION tokens by clicking Management > Recurring payments.
  2. Click Create.
  3. Select the Shop to notify from the list if you have several shops.
  4. Enter the Buyer e-mail e-mail address.
  5. A token is generated by default in the Token ID field. You can click on the button Generate a new identifier if you wish.
    You also can enter your own token. You must, however, make sure it is unique.
  6. Select the payment method from the list.
    The presented payment methods depend on the MIDs associated with your shop.
  7. Enter the buyer’s card details.
    • Card number
    • Expiry date
    • CVV code
  8. If you wish, you can select the used currency when checking the payment method.

    This choice is useful when you have a multi-currency agreement associated with several shops, where each shop only supports one currency.

    It will always be possible to use the token for making payments in any currency supported by the agreement.

  9. Click Next.
    The buyer detail entry page appears.
    The Token section reminds you of the specified e-mail and the created token.
  10. Fill in the information about the buyer.

    These details are useful for buyer identification.

    Fields marked with an asterisk (*) are required.

  11. Click Create to complete the process.

Creating a token using a transaction

This action allows the user to create a token of the payment method used for the payment.

This action is authorized only if the original transaction status is:
  • accepted
  • to be validated
  • waiting for capture
  • captured
  • capture in progress
The payment method used for the original transaction must:
  • support payment by token,
  • be supported by a non-terminated MID associated with the shop.
Token creation leads to creating a transaction of VERIFICATION type and sending the following notifications (if the Merchant has enabled the corresponding rules):
  • Instant Payment Notification URL on an operation coming from the Back Office,
  • Confirmation e-mail of token creation sent to the merchant,
  • Confirmation e-mail of token creation sent to the buyer.

A line will be added to the detail summary of the original transaction in order to track the transaction.

To create a token:

  1. Right-click the transaction.
  2. Select Create a token using a transaction.
    The token creation wizard appears.
  3. Enter the Buyer e-mail e-mail address.
  4. A token is generated by default in the Token ID field. You can click on the button Generate a new identifier if you wish.
    You also can enter your own token. You must, however, make sure it is unique.
  5. If you wish, you can select the used currency when checking the payment method.

    This choice is useful when you have a multi-currency agreement associated with several shops, where each shop only supports one currency.

    It will always be possible to use the token for making payments in any currency supported by the agreement.

  6. Click Next.
    The buyer detail entry page appears.
    The Token section reminds you of the specified e-mail and the created token.
  7. Fill in the information about the buyer.

    These details are useful for buyer identification.

    Fields marked with an asterisk (*) are required.

  8. Click Create to complete the process.

If all the payment method verification processes have been successfully completed, the token detail window appears.

It mentions the Token ID. It corresponds to the newly created token. Later on, it can be used for another financial operation in your shop(s).


The token will not be created if the authorization request is rejected.

Updating a token

There are two different operations for updating a token:
  • Update buyer details

    This operation allows to update information about the buyer. It also gives the possibility to update the token ID.

  • Replace the payment method

    This operation allows to update the buyer's payment method. It also gives the possibility to update the token ID.

In order to update buyer details
  1. Via Management > Recurring payments, search for the token to update.
  2. Right-click the token.
  3. Click Modify.
  4. Click Update buyer details.

    The token update page appears. Only editable fields are available for input.

  5. Edit the e-mail address, if needed.
  6. Generate a new token if you wish to replace the old one.
  7. Complete or edit the information about the buyer.

    Only editable fields can be updated.

  8. Click the Validate button to save the changes.
In order to replace the payment method
  1. Via Management > Recurring payments, search for the token to update.
  2. Right-click the token.
  3. Click Replace the payment method

    The token update page appears.

  4. Generate a new token if you wish to replace the old one.
  5. Enter the new information about the buyer’s payment method.

    It is possible to replace the details of one payment card with the details of another payment card within the limits of the payment methods supported by the shop.

  6. Click the Validate button to save the changes.
 The token will not be updated if the authorization request is rejected.

In any case, the merchant will be notified about this update if the Instant Payment Notification URL on an operation coming from the Back Office rule is enabled.

Canceling a token

 
  • Canceling a token will result in canceling all the recurring payments that are currently associated with it.
  • A canceled token will remain visible in the Merchant Back Office.
  • The data related to the payment method associated with the token will be purged after 15 months of inactivity.
  1. Via Management > Recurring payments, search for the recurring payment to cancel.
  2. Right-click the token.
  3. Click Terminate.

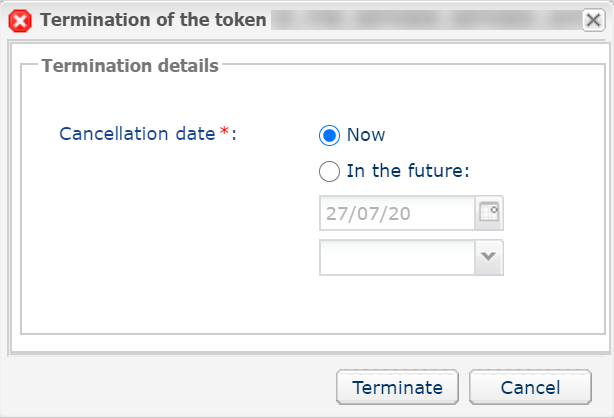
    The token termination wizard opens.

  4. Choose if you want to cancel the token immediately or later.

    You will then be able to choose the date and time of the cancellation.

  5. Click Terminate to complete the process.

Reactivating a token

A canceled token can be reactivated and used again.

This operation prevents the user from having to create a new token.

Attention: all the recurring payments associated with the token will remain canceled.

  1. Via Management > Recurring payments, search for the recurring payment to reactivate.
  2. Right-click the token.
  3. Click Reactivate.

Creating a recurring payment

To help you write the recurring payment rules, we have provided the possibility to create recurring payments via the Merchant Back Office.

Recurring payments are created on the basis of an existing token.

  1. Via Management > Recurring payments search for the token that will be used for creating the recurring payment.
  2. Right-click the token.
  3. Click Create a recurring payment.
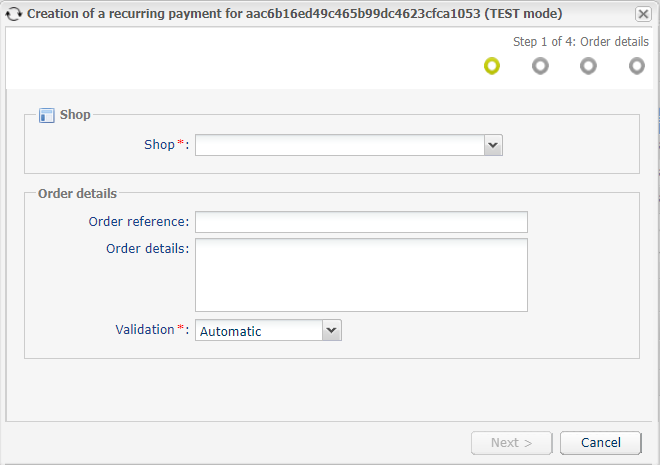
  4. Select the shop.
  5. Select the Validation mode (Automatic or Manual).
  6. Click Next.
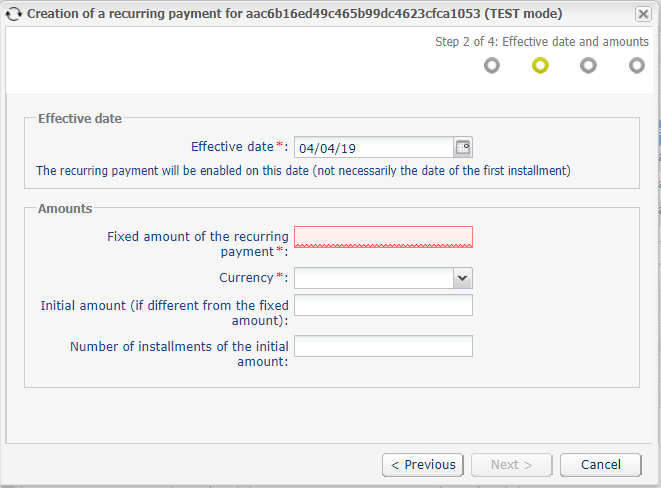
  7. Enter the effective date.
  8. Enter the fixed amount and the currency of the recurring payment.
    It is possible to define additional optional parameters (Initial amount if it is different from the fixed amount and the number of installments with the initial amount).
  9. Click Next.
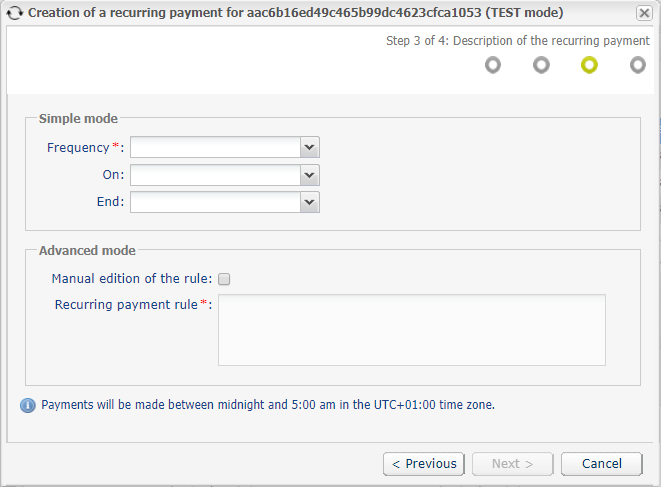
  10. Specify the recurrence rule in Simple mode or in Advanced mode.
    Check the box Manual edition of the rule if you wish to enable the advanced mode and specify the desired recurrence rule.

    The rule must respect the iCalendar (Internet Calendar) specification, described in the RFC5545 (seehttp://tools.ietf.org/html/rfc5545).

    Example of the rule in advanced mode:
    RRULE:FREQ=YEARLY;BYMONTHDAY=-1;BYMONTH=1,4,7,10;UNTIL=20221231
  11. Click Next to display the summary of the recurring payment.
  12. Click Create to complete the process.

Updating a recurring payment

 A recurring payment can no longer be updated once it has reached its validity date.
  1. Via Management > Recurring payments, search for the recurring payment to update.
  2. Select the recurring payment with a right-click.
  3. Click Modify.
  4. The recurring payment update wizard allows you to edit the following elements:
    • The effective date.

      This date cannot be before the current date.

    • The fixed amount of the recurring payment.
    • The currency of each installment.
    • A different amount, referred to as “initial amount”, to apply to the N first installments.

      This parameter allows to debit a different amount within several installments.

      Example of use: EUR10 per month for 3 months followed by EUR14.90 per month.

    • The number of installments where the initial amount is applied.
  5. Once you have finalized the changes, click the Validate button.

Canceling a recurring payment

 A recurring payment remains active until its expiration date.

In case of anticipated cancellation:

  • On the day of installment, the merchant must proceed to cancel the automatically created transaction.
  • Before or after the installment date, the recurring payment is canceled and no transactions will be automatically created on the installment date.
  1. Via Management > Recurring payments, search for the recurring payment to cancel.
  2. Select the recurring payment with a right-click.
  3. Click Terminate.
  4. Choose if you wish to cancel the token immediately or later.
    You will then be able to choose the date and time of the cancellation.
  5. Click Terminate to complete the process.

Managing expiring tokens

The validity period of a token depends on the validity period of the payment method linked to it.

The Back Office allows to configure the delay after which a token is considered to be about to expire.

When a token is about to expire, the payment gateway notifies the Merchant.

A payment method is always valid until the last day of the expiry month.

If the configured delay is set to 2 months, the notification will be generated on the 1st day of the month preceding the payment method expiry month.

Example: a notification will be issued on 01/01/2020 for a payment method expiring in 02/2020.

The payment gateway can notify the Merchant when a token is about to expire.

Configuring the notification delay

  1. Go to the following menu: Settings > Company > Subscription and alias parameters.

    The notification delay is defined in number of months with a minimal value of one month.

    The default delay is 2 months.

  2. Update the value of the Warning period for the payment methods that are close to their exp. date field.
  3. Click Save.
    The update of your notification delay is taken into account.

Viewing expiring tokens

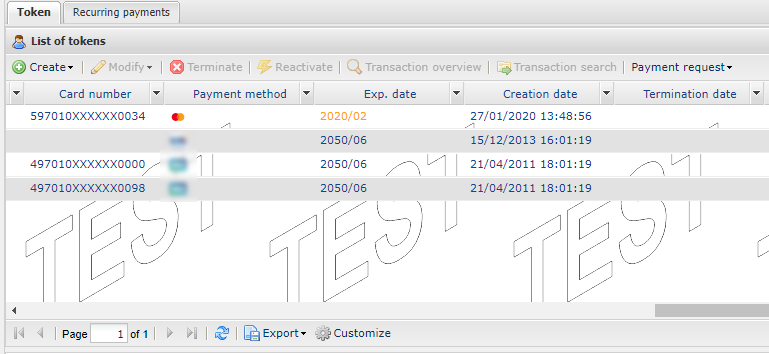
The approaching payment method expiry dates will be identified with a color code in the Merchant Back Office (Management > Recurring payments):
  • Orange if the expiry is approaching,
  • Red if the delay has passed.

You can sort tokens by expiry date by clicking on the column Exp. date.

Expiring card files

The gateway generates files (one for each company and each shop) containing the tokens that are about to expire and uploads them to our SFTP server respectively in the following directories:

  • shopId/id for the file listing the tokens with at least one subscription for this shop and whose payment method is about to expire.
  • common/id for the file listing all the tokens (with or without subscriptions) that have not been canceled and are about to expire.

Expiring card files are generated every 1st of every month, at 4:00 UTC.

These files are never sent by e-mail.

For more information on these files, see the File exchange, Expiring card files implementation guide available in our online documentation archive.

Obtaining help

Viewing online documentation

Getting in touch with technical support

For any technical inquiries or if you need any help, contact technical support.

Our services are available from Monday to Friday, from 9 a.m. to 6 p.m..

In view of facilitating the processing of your requests, please specify your shop ID (an 8-digit number) in your query

This information is available in the “registration of your shop” e-mail or in the Merchant Back Office (Settings > Shop > Configuration).